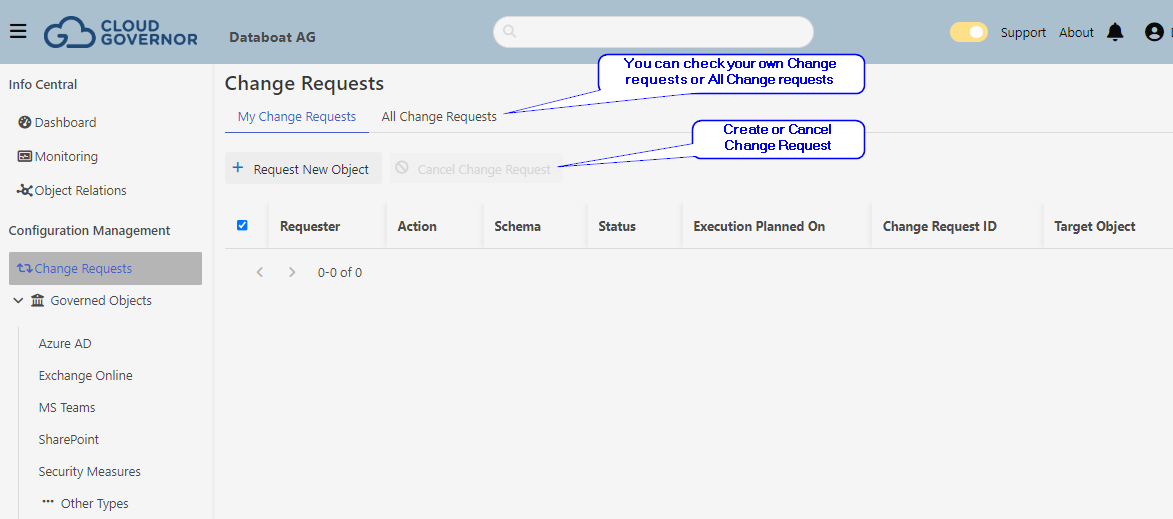
Change requests
Change request is the mechanism used to schedule a task/action in Cloud Governor. It can be used to schedule an action like the creation of an object at a specific time.
System will check the "Change Request queue" and if it's time to execute it triggers the action.
Third party tools will use, the Change request API to perform actions with Governor
Status
- When a Change request is created, the initial status is "Planned". It means the request can be canceled by requester.
- Once the request becomes "Scheduled" it cannot be canceled as Governor is working on it.
- If Change request is processed it can return "Applied" or "Error"
- Error means missing or wrong parameters, so Govenor cannot execute this request
- Applied. Change request is executed. It doesn't mean the result is the expected result.
It could happen that the request is ok (all parameters are ok) but executor is not able to perform this action for any reason.
Change Request view
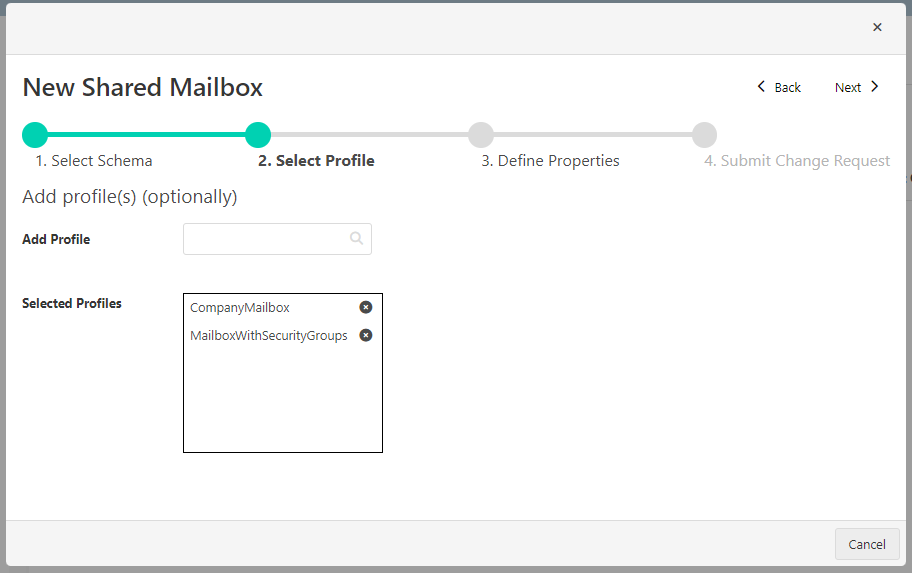
Change Request Wizard
When we create a Change request in the portal (Governor UI), the process is guided by a wizard helping End user to create it.


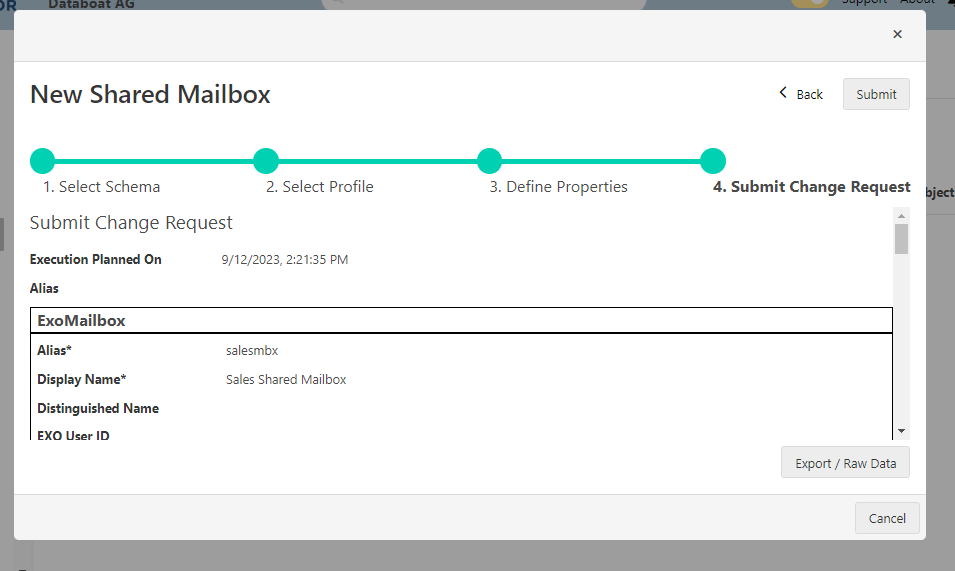
Sample of Change request
{
    "operation": {
        "action": "Create"
    },
    "configuration": {
        "setSchema": "SharedMailbox",
        "setProfiles": []
    },
    "data": {
        "ExoMailbox.Alias": "salesmbx",
        "ExoMailbox.DisplayName": "Sales Shared Mailbox",
        "ExoMailbox.DistinguishedName": "",
        "ExoMailbox.Identity": "salesmbx",
        "ExoMailbox.MailboxEnabled": true,
        "ExoMailbox.MessageCopyForSendOnBehalfEnabled": true,
        "ExoMailbox.MessageCopyForSentAsEnabled": true,
        "ExoMailbox.onPremisesSyncEnabled": false,
        "ExoMailbox.PrimarySmtpAddress": "sales@yourdomain.ch",
        "ExoMailbox.UserPrincipalName": "sales@yourdomain.ch",
        "ExoMailbox.UseSecurityGroups": false,
        "ExoMailboxCAS.ActiveSyncEnabled": true,
        "ExoMailboxCAS.ImapEnabled": true,
        "ExoMailboxCAS.MapiEnabled": true,
        "ExoMailboxCAS.OWAEnabled": true,
        "ExoMailboxCAS.PopEnabled": true
    },
    "executionPlannedOn": "2023-09-12T12:05:27.7480032+00:00"
}
How to create a Change Request in Governor UI
- Go to Change Requests in the left navigator
- Select ** Request new Object **
- Choose the Object Type and the Schema and click Next
- You could start selecting Schema directly then the Object Type will be automatically assigned
- You could start selecting Schema directly then the Object Type will be automatically assigned
- You can select then one ore more Profiles for this Schema (if there are profiles available) and click Next
- Fill the Fields for the new Object and click Next
- Review if everything is correct and then Submit or Back to correct some values.
- Close the modal window, now you can check the request status in the view